
The good news is that in today’s POD market, success rarely hinges on having master-level illustration skills. Instead, it’s about understanding your market, adhering to the rules, and utilizing the appropriate tools. This article provides a comprehensive, hands-on guide from scratch, covering core technical standards, top tool recommendations, and practical tips for avoiding common pitfalls. Whether you want to sell T-shirts, shoes, or vegan leather bags, this guide will help you craft professional-quality designs.
Master the 4 “golden technical rules” of pod design
The biggest rookie mistake is creating a beautiful design that ends up blurry or off-color when printed on the actual product. Before you start designing anything, you truly must follow these technical specs:
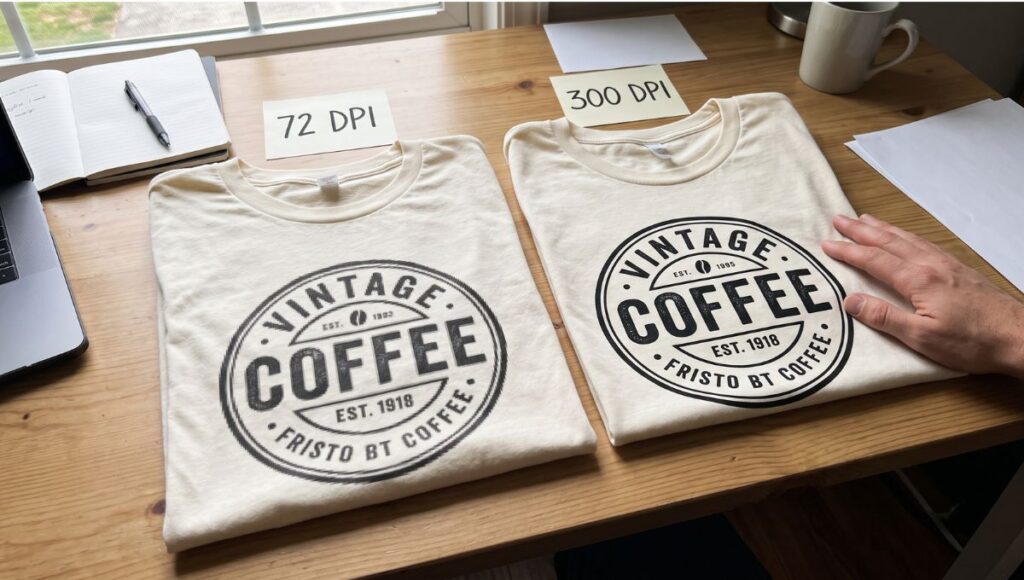
- Resolution must be at least 300 DPI (Dots Per Inch) to ensure a crisp print. If you use anything lower than 300 DPI (like a 72 DPI image saved right off the web), your final product will look heavily pixelated and jagged.
- Export as a PNG with a transparent background: Unless you want an awkward white box printed around your design on a T-shirt, always check the “transparent background” box when exporting your file. PNG is currently the gold standard for the vast majority of POD platforms (like Printify, Printful, and JetPrint).
- Standard canvas sizes: Different products require different canvas proportions. For best-selling T-shirts, the industry standard canvas size is typically 4500 x 5400 pixels. If you plan to design other items, keep in mind that different POD companies and products usually have specific, fixed canvas dimensions. Once you set your canvas to these exact sizes, you can upload your design straight to the corresponding product without needing to make any further tweaks.
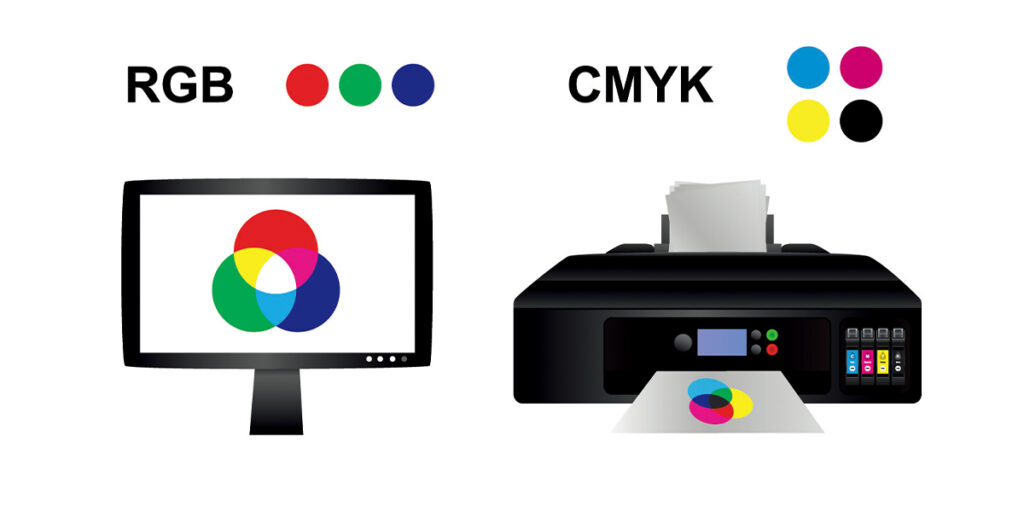
- Watch your color modes (RGB vs. CMYK): Your screen displays in RGB, but factory printers use CMYK ink. Since CMYK has a narrower color gamut, the super bright, fluorescent colors you see on your monitor will often look dull and muted on the physical product. Try to steer clear of overly saturated neon colors when creating your designs.
Where to find royalty-free, commercial-use assets and fonts
In the POD world, copyright compliance is your lifeline. Never just grab images from Google Image search—doing so is a quick way to get your store permanently banned or even face legal action. You need resource libraries that explicitly offer a “commercial license.”
Creative Fabrica: This platform offers a massive library of graphics designed specifically for t-shirts, along with an incredible variety of unique fonts. Once you subscribe, everything you download comes with a full, built-in POD commercial license.
Vexels: A platform built from the ground up for the POD industry. It provides high-quality, transparent-background vectors and ready-to-use t-shirt designs that are highly targeted and neatly categorized by niche.
Free stock image sites (Pixabay / Unsplash / Magnific): While these sites offer free high-resolution photos, a word of caution: never upload and sell these raw images exactly as you downloaded them. You must make substantial modifications (such as adding typography or blending them with other graphics) to avoid violating platform policies on reused content.
AI tools (Gemini Nano Banana / GPT Image / Midjourney): These are primarily used to break down design barriers and overcome creative blocks. By using precise prompts, you can quickly generate unique illustrations or graphics in specific styles (such as anime, abstract, or minimalist). However, these generated images cannot be used directly on your final products; rather, they should be treated strictly as supplementary tools to spark your inspiration.
The ultimate design toolkit (no photoshop required)
If you don’t know how to use Adobe Photoshop or Illustrator, don’t sweat it. Today’s online tools are incredibly powerful and built specifically for non-designers.
| Design tool | Core features | Best for | Pricing |
| Kittl | Currently the hottest tool in the POD space. Features a massive library of vintage illustrations, incredibly powerful text warping capabilities, and 1-click editable templates. A commercial license is included. | Complex layouts, vintage t-shirt designs, and badge/logo-style graphics. | The free plan is available; Pro is ~$19/mo |
| Canva (Pro) | Exceptionally user-friendly and perfect for beginners. Offers a massive library of design assets and a 1-click background remover that significantly boosts workflow efficiency. | Minimalist designs, typography layouts, and social media promo graphics. | ~$18/mo (Highly recommend upgrading to Pro so you can export with a transparent background) |
| Placeit | The ultimate mockup generator. It also comes packed with tons of ready-to-use design templates that seamlessly combine text and graphics. | Generating highly realistic product mockups and quickly applying pre-made templates. | ~$14.95/mo |
Create your first design in 4 simple steps
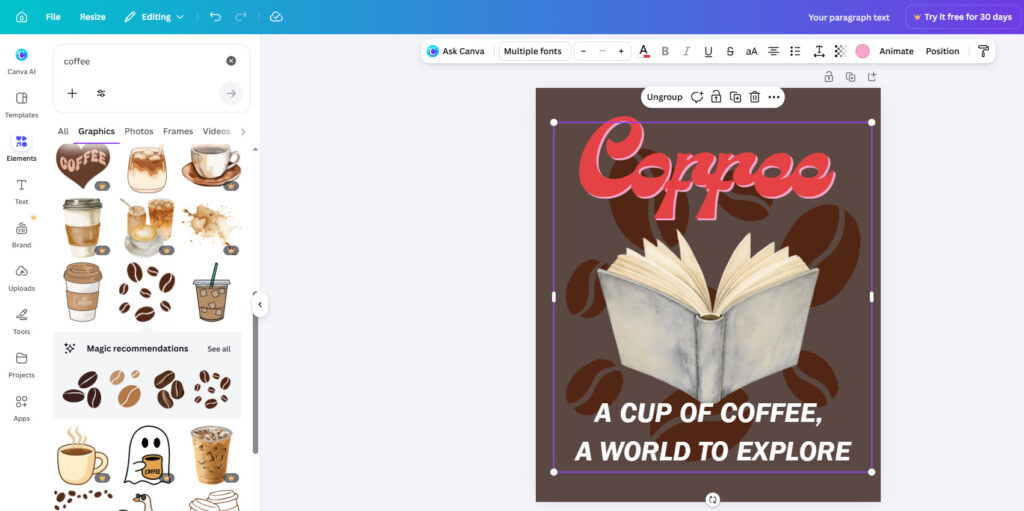
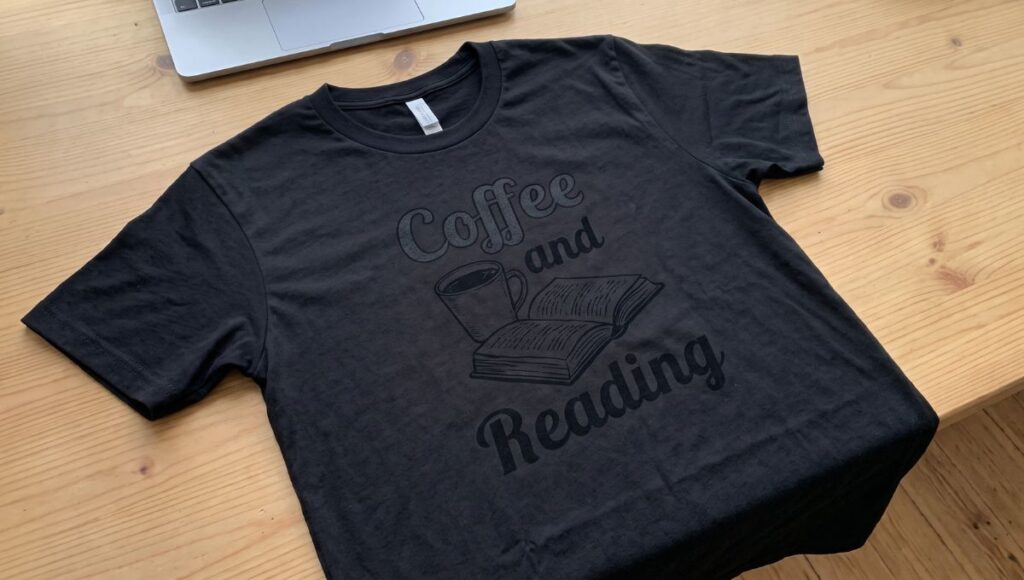
Let’s walk through creating a minimalist “Coffee and Reading” design using Canva as an example.
Step 1: Set up the right canvas
Open Canva, click on “Create a design,” and select “Custom size.” Enter a width of 4500 px and a height of 5400 px.
Step 2: Find your core visual elements
Search for “Vintage Coffee” or “Books” in the elements library. Pick a clean vector illustration without complex gradients and place it in the upper center of your canvas.
Step 3: Add and arrange your text (Typography)
Typography is often the soul of a design. Add a relatable quote above your illustration (for example, “A cup of coffee, a world to explore”).
Pro tip: Use a bold, artistic font for the main text and a clean, sans-serif font for the tagline below it to create visual contrast.
Step 4: Check the contrast and export
Make sure the colors of your text and graphics will pop against your target t-shirt color (for example, use white or light yellow for dark shirts, and brown or navy blue for light shirts). Once everything looks good, click “Download,” choose PNG as your file type, and make sure to check the “Transparent background” box.
Top 3 beginner mistakes you must avoid
Intellectual property (ip) infringement: While popular IPs might seem like an easy way to drive sales, you should absolutely never use anime characters, Marvel properties, Disney characters, or famous band logos. Even a hand-drawn Pikachu counts as copyright infringement. If caught, your store will be suspended, and in severe cases, you could face legal action.
Overcomplicating your designs: Beginners often try to cram too many elements onto a single shirt, assuming that if a buyer likes just one of those details, they’ll make the purchase. In reality, the best-selling items on platforms like Etsy and Amazon are typically simple one-liners, humorous quotes, or minimalist graphics.
Ignoring how designs look on black shirts: Black is universally the best-selling T-shirt color across the internet. If you use black text in your design, it will completely disappear when printed on a black shirt. Make it a habit to double-check your designs against both dark and light backgrounds.
Final thoughts
Once you’ve mastered the technical specs mentioned above, learned to leverage tools like Kittl and Canva, and strictly adhered to commercial licensing rules, creating print-on-demand designs becomes a fun and scalable business. If you know how to create POD designs but aren’t quite sure how to actually launch your store, be sure to check out this article on how to start your POD business.
As your print-on-demand business grows, you’ll want to keep honing your design skills and drawing inspiration from other designers. Just as a writer improves with every piece they write, your design abilities will naturally get better with every project you complete. Ultimately, diving into print-on-demand design might feel a bit intimidating for beginners at first, but armed with the right tools, solid research, and a little experience, you can confidently embark on this journey.
FAQ
Can I print internet memes directly on apparel to sell?
No. The original images used in most memes (like photos of people or movie stills) are copyrighted. You can riff on the joke or concept, but you must create your own original design from scratch using royalty-free fonts and illustrations.
What should I do if I have a complex design idea that's beyond my skill level?
Outsourcing is your best bet. You can hire a professional freelance illustrator on platforms like Fiverr or Upwork. For around $10 to $30, you can purchase the full commercial rights to a custom, original design created specifically for your niche.
Which is more important for uploading designs: quantity or quality?
If you aren’t planning to use SEO to drive traffic to your store, and your goal isn’t to build a sustainable, long-term brand, then quantity is just as important as quality in the beginning. Uploading a high volume of designs gives your products a better chance of being discovered on Google. However, if you are looking to build a brand, quality should be your number one priority. Catching your audience’s eye and sparking their interest is the crucial first step to making a sale.
Bring Your Designs to Life with JetPrint
I tried this method and it worked flawlessly. Thanks!
Hello Michael,
I’m glad to hear that this article was helpful to you.